Read this to learn how to tell an abutment, a stack flashing and a stepped flashing apart, what causes each to fail, when a patch is the right answer, and MyJobQuote's typical UK cost range for chimney leadwork.
Rain does not usually beat a roof on the open slope. It finds the places where the slope stops, at a party wall, around a chimney or beside a taller part of the house, and that is where lead flashing earns its keep. A flashing is a strip of sheet lead set into the masonry at one edge and laid over the roof covering at the other, so water running down the brickwork is carried out on to the slope instead of behind it.
Because flashings take so much water in so little space, a failed lead flashing soon shows inside the house. A stain on a chimney breast, a damp patch beside a party wall in a loft, or a drip in the corner of an upstairs room can all begin at a few centimetres of failed lead.
This guide sorts the three shapes you will hear named, abutments, stacks and steps, and explains why each fails. It shows what a repair involves, when a patch is enough and when a section should be renewed, and the lead code that is named for one job only. It also gives MyJobQuote's typical range for chimney leadwork, with its date, so you can read a written price against it.
Abutments, stacks and steps: three shapes of flashing
The names describe where the lead sits, and knowing them makes a roofer's description of a fault easier to follow.
- An abutment is any spot where a roof slope finishes against a higher wall: the flank of a taller neighbour, a party wall or the side of a porch.
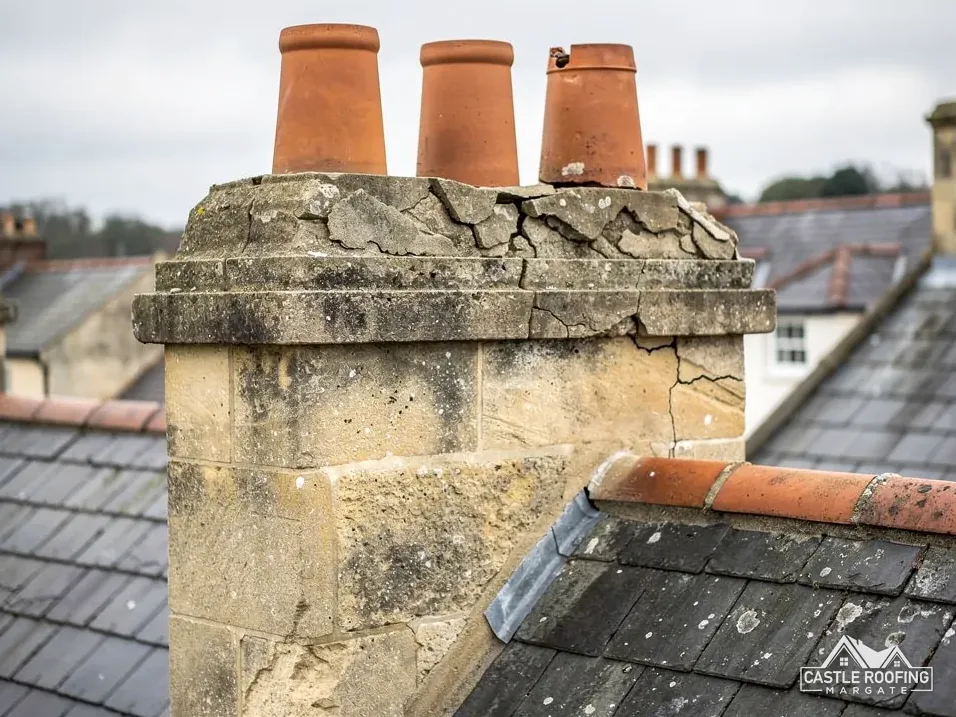
- A stack flashing wraps a chimney. It has an apron at the front, separate pieces up each side, and a back gutter behind the stack where the slope rises to meet it.
- A stepped flashing follows a sloping roof edge up a wall. Each step is cut to fit a course of bricks, so the line of lead rises like a staircase.
Under all three, the covering is dressed against the wall with its own lead. On a tiled or slated slope, small folded pieces of lead called soakers slide under each course and turn up the wall, and the flashing laid over them covers the join. Lead is sold by weight in codes, and Code 3 is described by one maker's brochure as for soakers only. For any other flashing, the specification drawn up for that roof names the code.
The top edge of any flashing sits in a groove cut into the brickwork, called a chase, or is hooked behind a joint. That edge is then sealed with mortar or a lead wedge, so the weak point is often the wall joint instead of the metal.
Why flashings fail
Lead is a long-lived metal. MyJobQuote's page on chimney leadwork gives a life of over 80 years for lead flashing, which reads as a floor for sound lead rather than a limit, and a flashing can fail far sooner for reasons that have little to do with the metal.
The causes fall into a short list of patterns.
- Open joints in the wall. Mortar in the chase weathers and falls away, and water runs in behind the lead.
- Thermal movement. Lead expands in sun and contracts at night. A long, rigidly fixed strip tears at its fixings or cracks along a fold.
- Lifted edges. Wind lifts a loose edge repeatedly until it creases, and the crease splits.
- Unsuitable repairs. A bitumen strip or a bead of sealant gives a cheap look but hides the real fault and often cracks within a few years.
- Poor detailing at the corners. Where a stepped flashing turns a corner, or a stack apron meets a side piece, an unlapped gap lets water through.
Exposure adds to every one of these. The Met Office averages for Manston (1991 to 2020) give a mean wind of 9.86 knots, measured at that one station. Those figures are averages and say nothing about one particular gable, which is why a close inspection matters more than a general rule.
Often the lead is sound and the wall is the problem, so the first job is to see which one it is before any metal is ordered.
Reading the signs from inside and outside
Flashing faults leave clues, and a few show from the pavement through binoculars. Others only show indoors.
From outside, look at the line where the roof meets the wall or the chimney. A gap you can see daylight through, lead lifted away from the brickwork, a tide mark of old mortar below the flashing or a thick black smear of old sealant are all worth noting. A step that has dropped lower than the one beside it suggests the lead has slipped on its fixings.
From inside, a damp patch usually shows on the wall that adjoins the roof or on a ceiling next to the chimney breast. In a loft, check the underside of the roof around the chimney stack. If there are brown rings, wet insulation or timber that looks darker around the stack than elsewhere, water is getting past the flashing.
Signs that point somewhere else
Condensation can leave damp on a chimney breast without any leak, and a cracked chimney pot or crown can let rain in above the flashing line altogether. Telling these cases apart is the point of a survey that studies the whole junction instead of the lead alone.
Photographs of your own stack or wall, taken close up and from a distance, help a roofer give a first view before a visit. They cannot replace the visit, because the back of a flashing is hidden until it is lifted.
What a proper repair involves
The work depends on how far the fault has spread. These are the usual levels, from smallest to largest.
- Re-pointing the chase. Failed mortar is cleaned out of the chase and the lead is refixed with fresh mortar or lead wedges. This suits a sound flashing whose only problem is the wall joint.
- Local renewal. A single failed piece, perhaps one step or one side of a stack, is cut out and replaced with new lead lapped under and over its neighbours.
- Full renewal. When the lead is split in many places, the whole flashing is taken off, any soakers are renewed, and new lead is dressed in from the base to the top.
Patching with sealant is not on that list on purpose. A bead of sealant seals a crack for a short time but not the movement that caused it, and it makes the next proper repair harder because the lead has to be cleaned first.
A stack flashing is more involved than a wall abutment because there are several pieces: the apron, the sides, the back gutter and the soakers under them. These pieces have to be lapped in the right order so water runs from one onto the next. A back gutter in particular must carry water around the stack and not trap it, which is why a repair at the back of a chimney is sometimes the most delicate part of the job.
Access is normally by scaffold or a tower, and the written price should say how the roof is reached.
Cost range for chimney leadwork
MyJobQuote, on a page updated on 22 September 2026, puts the cost of replacing leadwork on a chimney at between £350 and £920. That is a national typical range, so read it as a rough marker rather than a quote for your own stack.
| Source | Work | Range |
|---|---|---|
| MyJobQuote, updated 22 September 2026 | Replacing leadwork on a chimney | £350 to £920 |
An abutment or a stepped flashing along a gable is priced after a survey. A longer run of steps costs more than a short one, a stack with a back gutter costs more than a simple apron, and the amount of re-pointing around the chase changes the total.
What shapes the price:
- how many pieces of lead are being renewed and how long the runs are;
- how much of the wall joint must be raked out and re-pointed;
- how the roof is reached, since a tall chimney may need a larger scaffold;
- whether the soakers beneath are sound or must be replaced too.
The price you receive is a single written total, set after the survey. When you compare it with any other quote, check that both include VAT and the access, so the two numbers describe the same job. Ask also whether the figure covers making good the wall joint, because a flashing renewed without sound pointing around it will fail again at the same place.
When to repair and when to replace the lot
Repair makes sense where the harm is confined to one place and the remaining lead is sound. A single lifted corner or a patch of failed pointing does not justify taking a whole stack apart.
Replacement is the right answer in other cases. If the lead has split along many folds, if it has been smeared with sealant over several earlier repairs, or if the soakers underneath have slipped so far that the covering no longer overlaps them, then repairing one spot only moves the leak somewhere else. In that situation a clean, complete renewal gives a better result and avoids paying for several visits.
Age alone is not a reason. Lead that has gone dull and grey is behaving normally, and a flashing that is sound but dirty needs no work. For the same reason, white powdery staining on lead is a surface effect that is dealt with separately in the guide on white staining on lead.
Related faults
Two related guides go further into particular faults. Cracked lead flashing deals with splits at the folds, and stepped lead flashing covers the staircase detail along a gable. The full range of lead work, from valleys to flat roofs, is on the lead roofing page.
If a repair is chosen, ask the roofer to show you the old lead once it is off. A split that matches the leak is the clearest proof the right part was replaced.