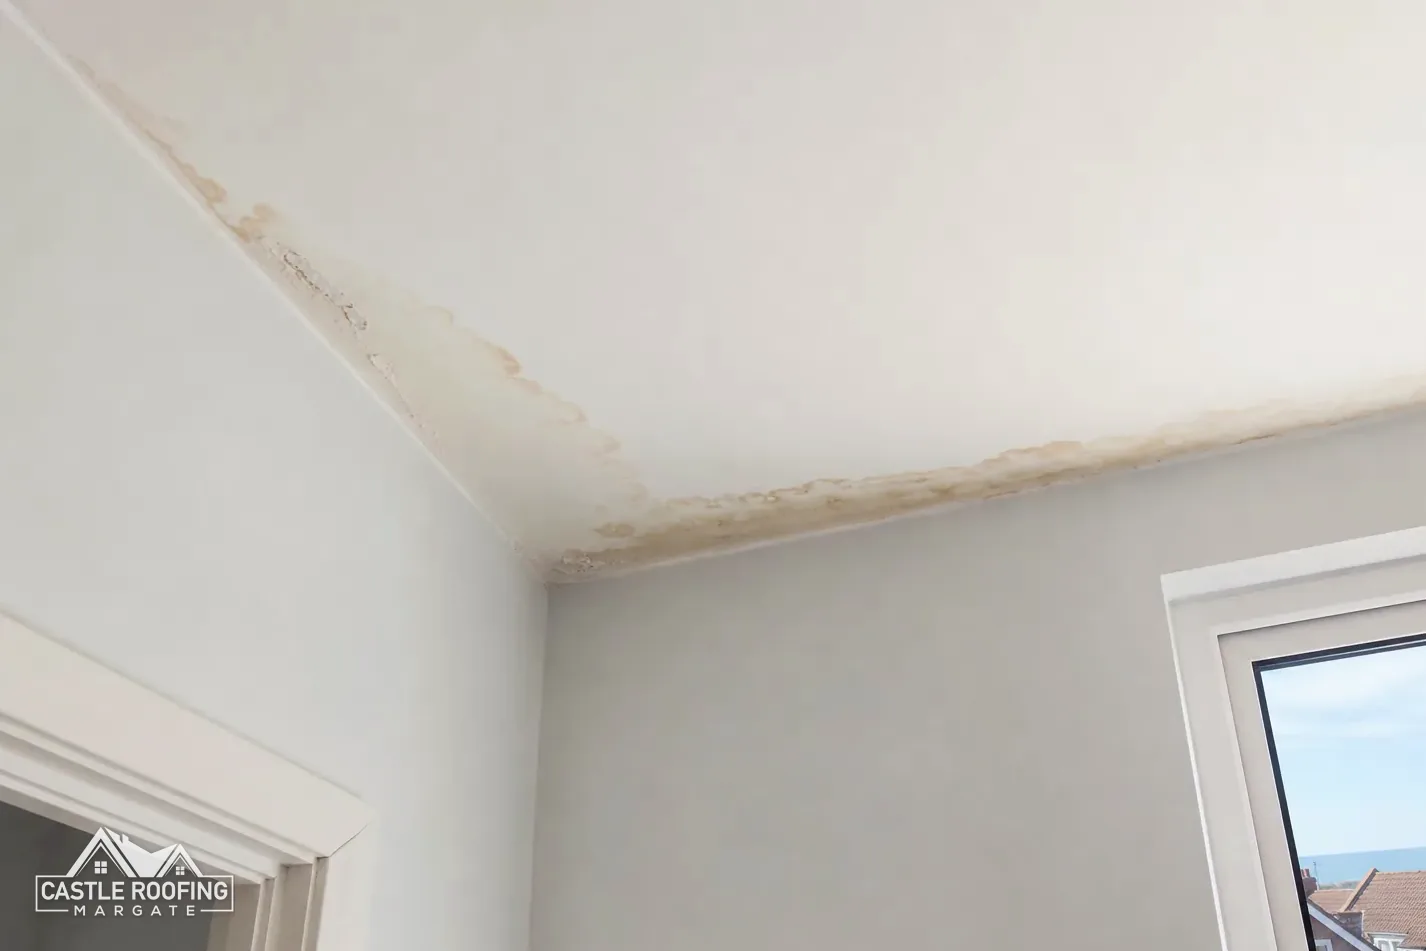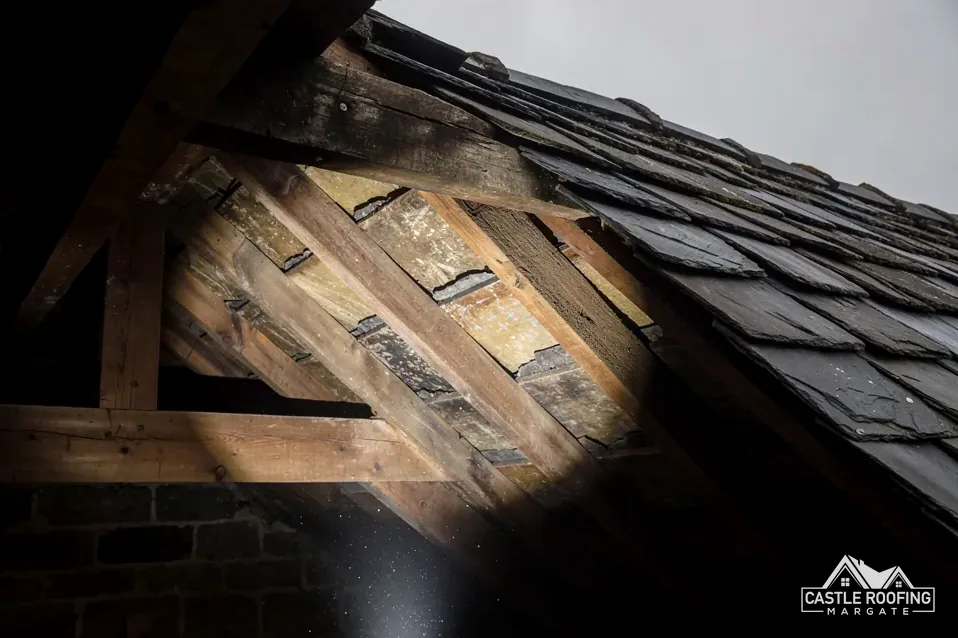

A loft shows a roof's faults before the ceilings below do. This guide covers how to move through one safely, what each mark on the timbers and underlay tends to mean, and which pictures help a roofer judge the fault.
From the street you see a roof's outer face. From the loft you see what that face is protecting, and that is where a fault leaves its first marks. A damp patch on the underlay appears long before a ceiling stains, and a ring of dark timber around a chimney says something about the flashing that the ground view cannot.
A loft check is also the part of a roof inspection an owner can do unaided, because it needs a torch, a phone and some care rather than a ladder on the outside. It does not replace a survey. It does make the survey quicker, and it gives you pictures to send before anyone visits. A roofer reading those pictures can often say which part of the roof to look at first, which saves time on the day.
The order below is the order a roofer takes it: safety, then light, then the underside of the slopes, then damp and condensation, then the photographs. It is part of our roof inspections work, and it suits a terrace in Margate, a semi in Birchington or a villa in Westgate alike.
Getting up there without making things worse
Safety comes before looking. A loft is a working space with hazards that do not show in a torch beam, and the accident to guard against is a foot through a ceiling. Ceiling plasterboard is not made to carry weight, so every step goes on a joist, which is a horizontal timber that carries the ceiling, or on boards that are fixed to the joists.
Settle these before climbing in:
- Light: bring a strong torch and a spare, and switch on any fixed loft light first.
- Footing: step on joists or fixed boarding only, never on insulation or the gaps between timbers.
- Company: have someone below who knows where you are and can hear you.
- Clothing: wear long sleeves, gloves, a dust mask and something on your head, since nails and bracing come through low roofs.
- Hands: keep one free for the hatch edge when climbing in and out.
Two things call a halt. The first is anything that might be asbestos, such as old boards, lagging or sheeting. HSE guidance says a building built or refurbished before 2000 should be assumed to contain it, so a damaged board or old pipe wrap is photographed and left alone. The second is wildlife. A bat roost is protected by law, and under regulation 43 of the Habitats Regulations 2017 it is an offence to damage one, intent or not. If you find droppings, a nest or a roosting animal, stop and ask for advice before any work goes near that spot. Looking is lawful; disturbing is the problem.
Electrical cables, water tanks and pipes also run through lofts, so touch nothing that you cannot identify.
Daylight where it should not be
With the loft light off and your eyes adjusted, a sound roof is dark. A pinprick of daylight is a gap in the covering, and where it shows tells you what kind of gap. Light through a slate or tile means a crack, a slipped piece or a missing one. Light at the ridge, the top line of the roof where the two slopes meet, means the capping has lifted. Light along a wall suggests a flashing that has pulled away, and light around a chimney points at its leadwork.
Not every gleam is a fault. A cold roof is one with its insulation laid across the ceiling level, so the void above stays unheated, and it is built with ventilation. For a cold roof with a non-breathable HR underlay, Marley gives a continuous eaves gap of 10 mm on pitches steeper than 15 degrees and 25 mm at 15 degrees or less. Light showing at the eaves, where the slope meets the tops of the walls, may therefore be a vent doing its job rather than a fault.
What to note when you see light:
- Where it is, measured from the nearest wall or chimney.
- Whether it moves when the wind blows, which suggests a loose piece.
- Whether it sits above a stain or a damp timber below.
- Whether you can see a mark on the underlay beside it.
If the light is in a slope that faces the weather, the gap lets rain in as well as light, so it gets marked and reported. Our page on inspecting a roof from the ground shows how to match what you see inside with what is visible outside.
Underlay, battens and the underside of the slopes
Look first at the underlay, the membrane stretched over the rafters (the sloped timbers you can see overhead) beneath the battens that the tiles or slates hang from. Its job is to catch wind-blown rain and spray that gets past the covering and to guide it down to the gutter. Seen from the loft, its condition is easy to read.
| What you see | What it can mean |
|---|---|
| Dark, damp patch | Water coming past a tile or slate |
| Tear or sag | Underlay failed or fixing lost |
| Rusty nail tips | Damp air or old leaks |
| Tide mark on timber | Repeated wetting and drying |
| Bright, clean gap | Missing or slipped covering |
A sagging underlay holds water in a pocket, which then wets the batten behind it. A patch that is dark but dry may be an old leak that has stopped. A patch that is dark and cold to the touch is current. Pressing a thumb into a damp timber tells you more than looking at it, because a wet board gives and a dry one does not.
Nail tips that have rusted come through the underside of the battens in an older roof, and they are worth photographing close up. Corroded nails are a typical reason that slates slip, and the page on the photos a roof inspection produces shows what a useful image looks like. Do not pull at anything: a loose batten may be the only thing holding a tile up.
Damp timbers and condensation
A damp timber has two possible causes, and the loft shows which is likelier. A leak is water entering from outside at a point. Condensation is warm, moist air from the house meeting a cold surface and turning to water. The two can look alike, but they leave different patterns.
| Clue | Leak | Condensation |
|---|---|---|
| Spread | One patch, below a defect | Wide, across a slope |
| Timing | After rain | In cold spells |
| Mould | Around the patch | On the cold underside |
BS 5250:2021 is today's standard for handling moisture in buildings, and Approved Document C says ventilation of a cold deck roof meets the Building Regulations requirement. A loft that has had its eaves vents covered by insulation, or whose ventilation was never fitted, will show water on its underlay and its nails. Insulation that is pushed hard against the eaves can choke the airway that the roof relies on.
If your loft is covered with spray foam, the picture changes. The RICS consumer guide cautions that once the roof timbers are covered in foam, nobody can fully see or inspect them, and the page on inspecting a roof with spray foam explains what that means for a survey. The Energy Saving Trust says the rot risk is much lower with open-cell foam, though never nil, and that you should not spray a leaking roof.
A damp timber is not automatically a rotten one. Softness, crumbling or a dark brown cracked surface point to rot, and those are the signs to photograph and report.
What to photograph, and how
Good pictures save a visit and make the next one shorter. Take them in sequence, so the set reads like a walk through the loft, and take each one twice: a wide view that shows where you are and a close view that shows the detail. IStructE's storm damage advice treats photographs as essential evidence in an insurance claim, since they show what happened. The same logic applies to a repair.
A useful set includes:
- the hatch and the loft as you enter, to show the general state and any insulation depth
- each chimney breast and stack from inside, with the surrounding timbers
- every daylight gap, with a hand or a ruler beside it for scale
- every stain, patch or tide mark, with a wide view first
- the eaves at each side, to show whether the airway is clear
- any area you could not reach, so the gap is on record
Flash flattens detail on damp timber, so use the torch from the side instead. Hold the phone steady against a joist. If you can, also take pictures of the ceilings below at the matching spot, since a stain downstairs and a mark upstairs are one story.
Send the set before a visit if you like. A loft inspection by you is a good start and a roofer's look is better, because the roofer reads the covering from outside as well. Once the findings are matched up, any work is priced as a single written total, and the first step is the same: a look at the roof.
Reading the findings together
One mark rarely tells the whole story. A roofer reads the loft as a set: where the light is, where the damp is, where the underlay has failed and which of those line up. When a gleam of daylight, a dark patch of underlay and a stained ceiling sit in a line, the fault is probably a gap in the covering directly above. When damp is wide and even, with clear underlay and no daylight, the likelier cause is moisture from inside the house.
Findings sort into three bands:
- Watch: old, dry staining with no new marks, checked again after the next wet spell.
- Repair: a single defect such as a slipped tile, a failed flashing or a torn patch of underlay.
- Investigate: widespread damp, soft timber or a sagging slope, which needs a survey from the outside as well.
The first two bands rarely call for a strip. A regular rhythm of loft checks, say after each winter, means a change shows up against the last set of pictures.
Keep each set of pictures labelled by date. A pair taken a year apart makes a slow change obvious, and it spares everyone an argument about whether a stain is new. If a repair is made, take another set afterwards, because the proof that a fault has stopped is a dry timber on the next wet day. Put the dated sets in one folder on your phone, so that a roofer who visits later can see the whole run of images and not just the latest.