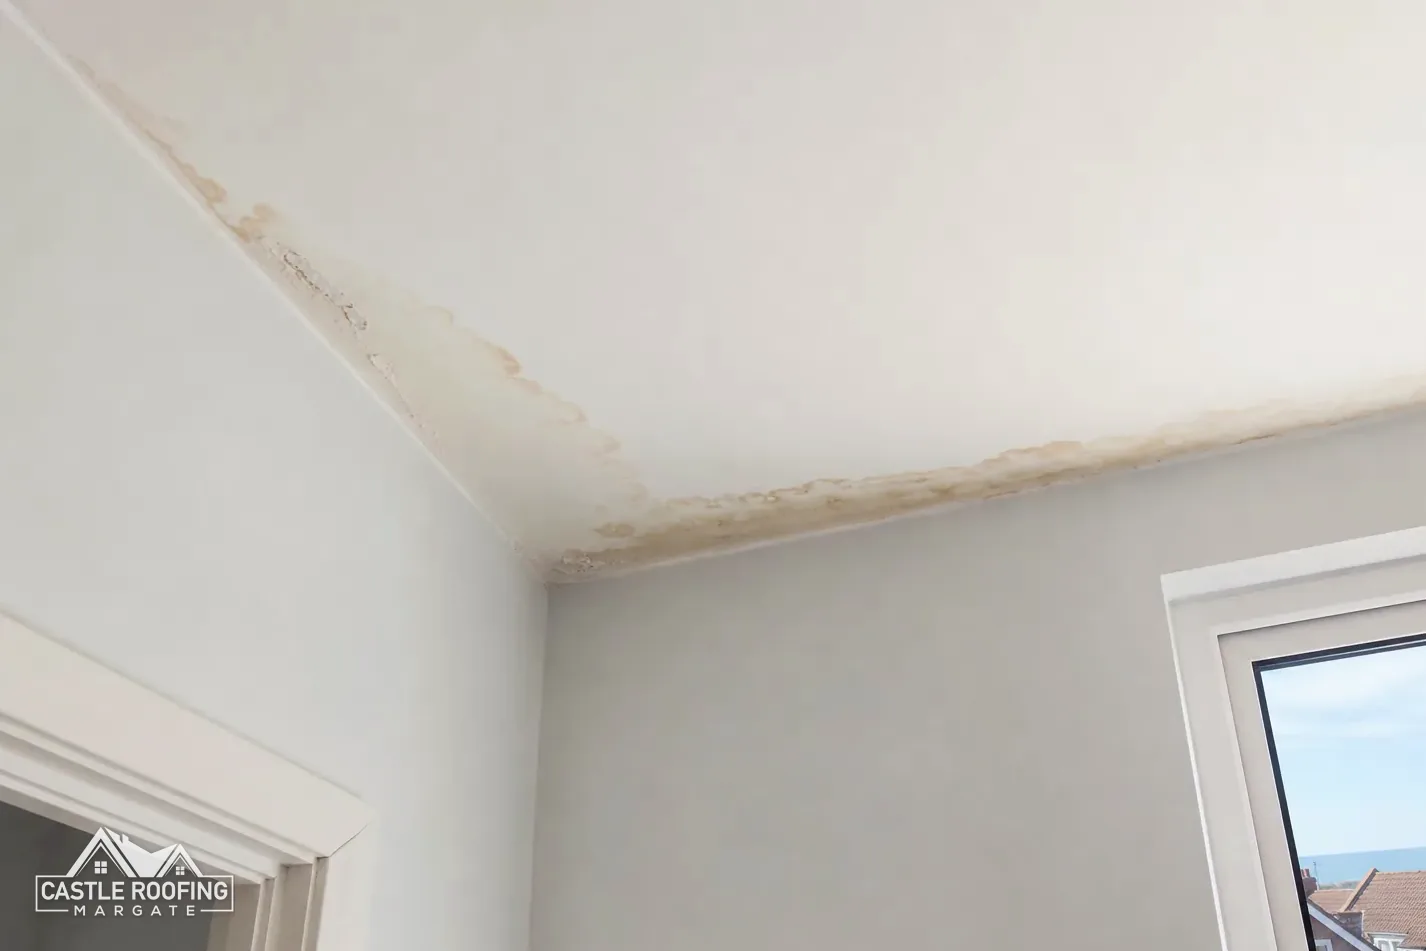

A stain on the ceiling rarely sits under the hole. This guide follows the route water takes through a roof, the parts that fail, the checks that prove where it gets in, and the damp that only looks like a leak.
Water that gets through a roof does not fall straight down. It lands on the underlay, runs along a batten or down a rafter, drips onto a ceiling joist, and only then shows as a brown ring in the bedroom. By that point it can be well away from where it came in, and it may have crossed the loft along the way.
That is why guessing from the stain goes wrong so often, and why a patch put on the wrong place leaves the leak running behind it. Finding the source is the real job. The repair that follows is usually small once you know where to put it.
This guide covers how the search works, in the order a roofer follows it: the room, the loft, the usual entry points on the outside, and then the checks that settle the matter. It also covers condensation, which stains a ceiling in much the same way. Tracing a leak sits under our roof repairs and emergency work, and a calm, systematic search is quicker than a panicked one.
Start at the stain, then go uphill
The search starts inside, with the room the water appeared in. Note exactly where the stain is, how big it is, whether it is wet or dry to the touch, and whether it has grown since it first showed. A stain that is damp on a dry day means water is still moving through the structure. A dry, brown ring with a hard edge may be old.
Then the question becomes which way is uphill. On a pitched roof, water follows the slope. So the entry point is higher than the stain, usually on the same slope and often some way along it toward the ridge. On a flat roof the water can run along the deck and sideways before it finds a way down, so the entry point can be on the far side of the stain.
Useful things to write down before anyone goes up:
- when it appears: during rain, after rain, only in wind, or in cold dry weather
- which way the wind was blowing when it started
- the position of the stain against the chimney, a wall, a window or a pipe
- whether it appears in more than one room
These notes narrow the search a great deal. A leak that shows only with wind from one quarter points to one slope or one flashing on that side. A leak after each shower points to something lower or closer to the gutter. A stain that appears in cold weather with no rain is a different problem again, covered in the condensation section below.
In the loft with a torch
If there is a safe way into the loft, the loft is where the evidence is. It is dim and cramped, but the underside of a roof tells you things the outside never will. Stand on the joists or on boards laid over them, never on the plasterboard between.
What the search looks for there:
- wet or dark patches on the underlay, rafters, battens and the insulation below
- drip marks and a trail of staining that leads back up a rafter
- daylight at a joint, which is a gap the water can follow
- torn, sagging or lapped underlay that has let water drop through
- timber that is soft when pressed, which means it has been damp for a long time
Damp insulation can hide the route. Water soaks into a quilt and spreads sideways, so the wet patch on the loft floor is also not under the hole. Lifting the quilt back reveals the trail on the timber beneath.
Where a stack or a roof window comes through, look at the timbers around it with particular care, as that is where water collects. A tide mark around a chimney breast, an old ring on a rafter that has dried and a new one beside it: these show a leak that has come and gone for a while, which tells you the repair has been put off more than once.
If the loft shows nothing, the water may be getting in through the walls or a pipe, and the search moves outside.
The usual entry points
Leaks gather at the places where the roof changes direction or something passes through it, because those are the joints a covering cannot seal by itself. A plain slope of sound tiles seldom leaks. The metalwork and the joints around it do.
| Place | What fails | What you see |
|---|---|---|
| Flashings | Lifted edge, split fold, corroded lead, tired sealant | Stain beside a wall or stack |
| Valleys | Cracked lead, blocked channel, worn lining | Stain under the line of the valley |
| Ridge | Cracked bedding, loose capping | Drips near the top, worse in wind |
| Roof windows | Perished seal, a poorly lapped flashing | Stain around the frame |
| Chimney | Flaunching, pointing, step flashing | Stain on the breast or ceiling |
Terms used here: a flashing is metal worked over a joint to shed water away from it, a valley is the trough between two slopes, flaunching is the cement bed round a chimney pot, and a soaker is a small lead sheet tucked under slates where a roof meets a wall.
Each of these is checked from outside by eye, and by touch where it is safe to reach. The roofer looks for lifted edges, gaps, sealant that has been used as a patch, and signs of earlier repairs. Sealant smeared over a flashing is a common clue: it means someone has already chased this leak, and the real fault is probably still there under the smear.
The gutters and the first course of the covering at the eaves also get a look. A blocked or overflowing gutter can push water back under the lowest tiles.
Chimneys and roof windows
A chimney stack is the place where a roof meets a masonry tower, and it brings together nearly every kind of joint in one spot. Water can enter at the pot, the flaunching, the pointing, the brickwork itself, the lead flashings round the base, and the back gutter where the stack stands up out of the slope.
The roofer works from the top down. The flaunching is checked for cracks, because a cracked bed lets water run into the flue and down to the room below. The pointing is checked for gaps. The flashings are checked for lifting, splits and the line of the lead where it enters the brick. A stain on the chimney breast inside, or damp on the wall beside a fireplace, points here more than anywhere else.
An unused flue with no cap or ventilation also takes in rain. That is a fault of the stack, not the roof, but the stain looks the same.
Roof windows
A roof window, or skylight, is a frame set into the slope with its own flashing set around it. Leaks there come from the seal, from the flashing, or from the way the flashing laps over the covering. The roofer checks whether the stain is at the frame or higher up, because water can run down a slope and into the window from above. Condensation on the glass itself is a separate matter and does not mean the window leaks.
Some of these joints are covered in our guides on water stains on a ceiling and leaks that only show in wind.
Condensation that looks like a leak
Not every ceiling stain is a hole in the roof. Warm, damp air from cooking, bathing and drying clothes rises into the loft, meets cold surfaces and turns to water. That water drips, darkens timber and stains ceilings, and the result is easy to mistake for a leak.
Clues that suggest condensation instead of a leak:
- the damp appears in cold, dry spells as well as wet ones
- it shows as black mould spotting, not a brown tide ring
- the underside of the felt or the nail tips are beaded with droplets
- bathrooms and kitchens vent into the loft or have no extractor
- the damp spreads across a wide area instead of one trail
Leaks, by contrast, leave a trail you can follow back to one spot, and they show up with rain, not with a hot bath.
BS 5250:2021 is the standard on moisture in buildings, and the fix for condensation is about moving air and moisture out of the roof space, not about patching the covering. Ventilation at the eaves and ridge, extractor fans that vent outside and insulation that does not block the airways all play a part. Marley's guidance on ventilating a cold roof with a non-breathable HR underlay, for instance, gives 25 mm along the eaves for pitches of 15° or less and 10 mm for steeper ones.
It is possible to have both problems at once, a small leak and a condensation load, which is why the trail and the timing matter.
Proving the cause before the repair
When the likely entry point has been picked out, a careful roofer proves it before anyone fixes it. The usual method is a water test: starting low and working upward, one section at a time, water is run onto the roof while someone watches the underside for a drip. Each stage of the test is noted, so the record can say which section of roof was wet when the drip began. The test stops the moment water shows. That is the point of entry. Starting high would flood the lower sections and muddy the result.
A test of this kind takes patience, and it needs two people, one outside and one in the loft. It is not always needed. Where a split flashing sits directly above a trail of staining, the cause is plain, and the fix can go ahead without a hose.
Where it cannot be proved at once, the honest course is to say so. A temporary cover can hold the roof while the weather turns, and the investigation continues in a dry spell.
Expect the finding to arrive with a record of your own roof: the entry point, the damage and the route inside. Repairs are then priced as one written total, with the cause shown beside it so you can see what the money pays for. Our guide to temporary roof repairs explains the stopgap that holds a roof in the meantime.