A checklist for the day after a North Sea gale: which parts of a seaside roof give way first, what you can safely see yourself, what the insurer needs to hear, and what a lasting repair involves.
Wind off the North Sea does not reach a house evenly. It pushes at the gable ends, lifts at the edges of the roof and worries at anything that is only held by mortar or by a few old nails. The morning after a gale, the garden is full of leaves and the instinct is to go out and look up. That is the right instinct, so long as you keep your feet on the ground.
This checklist takes the damage in the order it tends to show itself. First come the outside parts that fail first on a coastal roof. Then comes what the loft tells you, which is often more than the roof does from below. Then come the steps that protect an insurance claim, because a few photographs taken on the day matter more than a long account written later.
Nothing here asks you to climb. Slates are brittle, a wet roof is slick underfoot, and coming off a ladder or a pitch is a far worse outcome than a leaking ceiling. If something is hanging, leaking or about to fall, our roof repairs and emergency page has the number to ring and the WhatsApp route.
What gives way first on a seaside roof
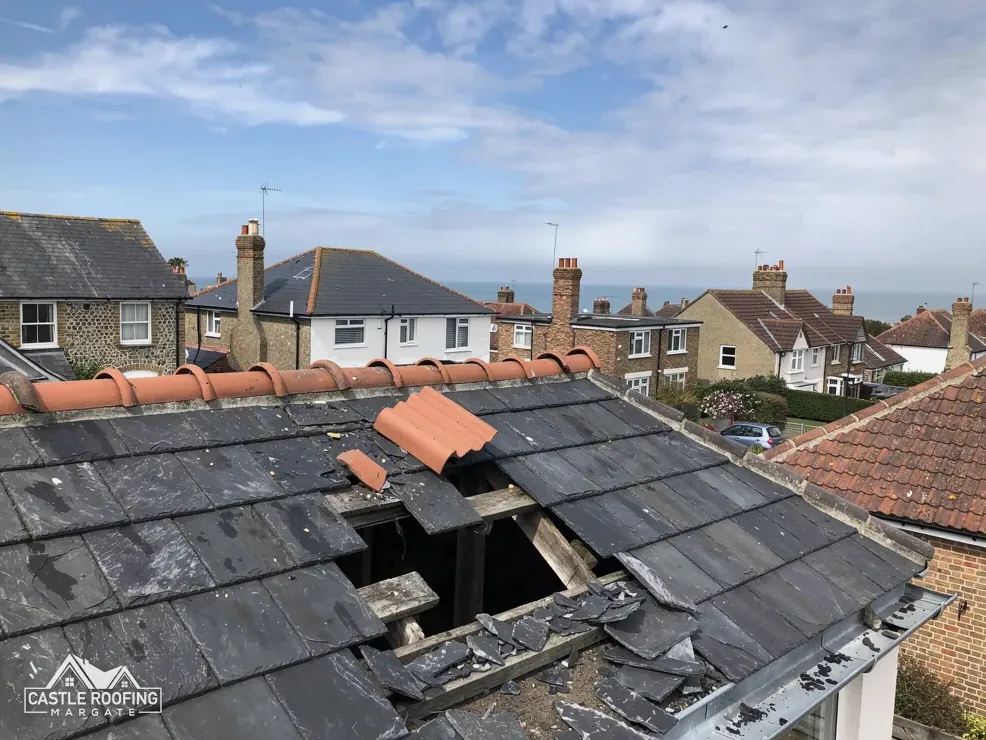
Wind does most harm where the roof ends. The places to look at first are the exposed edges and joints, and a Margate terrace has the same weak points as a bungalow in Westgate.
- The ridge, the line along the top where the two slopes meet, and the hips, the angled lines running down from it. Their capping tiles are often bedded in mortar that cracks with age.
- The verge, the roof's edge along a gable end. Tiles here can lift when wind gets under the edge.
- Flashings, the strips of lead or other metal sealing the joint between roof and chimney or wall.
- Felt on a flat roof, such as a garage or a rear extension, which can peel back at its edges.
- Chimney pots and the flaunching, the mortar bed that holds them.
Fixings matter as much as the tiles. The wind-uplift working in BS 5534 is what decides how many fixings a tile or slate needs, so the specification is chosen to suit how exposed the site is. Cupa, a slate maker, rates a site on the coast, on a hill or on a slope as more exposed than a sheltered one.
The Met Office gives a fair sense of the setting. Its Manston averages for 1991 to 2020 show a mean wind of 9.86 knots, against 7.07 knots at South Farnborough, an inland station used for comparison. Those are averages, not a forecast for your street. Looking back at 1987, the Met Office records a ship overturned in Dover and a Channel ferry driven ashore by Folkestone, along with Force 11 winds across many coastal districts of the south east. Dover and Folkestone are the towns that account names, not Thanet, yet both share the Kent coastline with Margate.
Check from the ground first
Start outside, in daylight, and keep clear of anything that looks loose. Wear sturdy shoes, as slate and tile fragments can lie hidden in the grass. A pair of binoculars turns a pavement or garden into a decent survey point.
- Walk the garden and the pavement in front for fallen tiles, slate, chimney pot pieces and lengths of ridge. Do not pick up anything near the house if more could follow.
- Scan every slope for a slate that has dropped below its neighbours, or a bare patch where one has gone.
- Check the ridge line for a missing or tilted section.
- Look at the chimney stack for tilted pots, a leaning stack or crumbling mortar around the base.
- Look at the gutters and downpipes for bent brackets, joints that have pulled apart and debris that now blocks an outlet.
- Check the fascia and soffit boards under the eaves for lifted or missing sections.
A tile that has slipped but not fallen is a hazard too, because the next gust finishes the job. If something threatens the path or the pavement, put a cone or a chair there and keep people away until it can be made safe. Our guide to tiles blown off in wind explains what happens next, including the make-safe visit.
Photograph what you find as you go, from the ground. Note which side of the house took the weather.
What the loft tells you
The loft is the safest place to learn about the roof. Go up in daylight with a torch, step only on boards or joists you trust, and study the roof timbers over the rooms below. You are watching for water, light and movement.
| You see | It may mean |
|---|---|
| Daylight through the roof | A missing slate or tile, or a gap at the ridge |
| Wet or stained timber | Water entering above, perhaps at a flashing |
| Damp insulation | A leak that has been running some time |
| Torn or sagging underlay | Wind has lifted the covering above it |
| Dripping from nails | Condensation, not necessarily a leak |
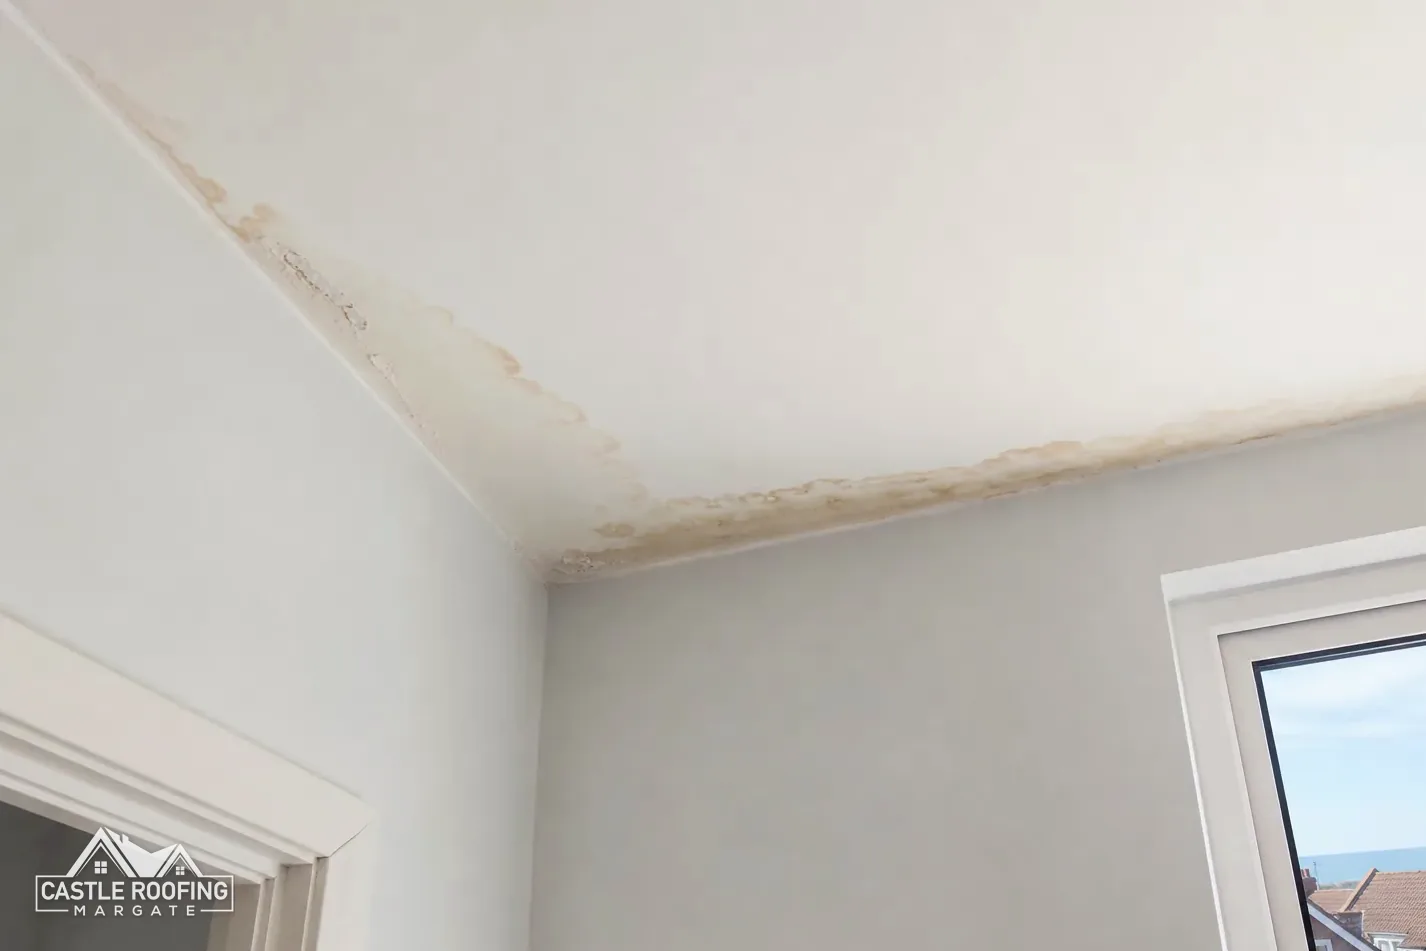
Underlay is the membrane laid under the battens, the narrow timbers that the tiles hang from. Where an old felt has torn, water can run along it before it drips, so the stain on the ceiling may sit some way from the hole.
If the ceiling below has a bulge or looks dark and soft, keep everyone out of that room, because plasterboard holding water can drop without warning. If a leak is near a light fitting or socket, switch the circuit off at the consumer unit. Use a bucket and a towel to catch drips. Do not push at a wet ceiling to let the water out, and do not walk across ceiling boards that are not joists.
Never go on the roof
It is tempting to nip up a ladder to push a slate back or throw a tarpaulin over a gap. Please do not. A storm leaves roofs wet, slippery and unpredictable, with tiles that are loose in ways you cannot see from the ladder. A fall from height can change a life, and a patched roof is a poor trade for it.
A proper make-safe is a job for people equipped for work at height, with the right access, and it is a different job from the lasting repair. It stops water coming in and removes pieces that might fall. The repair that follows puts the roof back as it should be, and it is often done on another day, when the weather is dry and the right materials have arrived.
Be wary of a stranger who knocks after a gale and says your roof is in danger. Ask to see photographs of what they claim, and expect a written scope and a total written price before work begins. For planned work, Citizens Advice recommends asking at least 3 traders for quotes in writing.
When you ask a trader to visit for an urgent repair, regulation 28(1)(e) of the Consumer Contracts Regulations 2013 removes the 14-day cancellation right. The exception covers that urgent repair alone. Anything bigger put forward on the day is a fresh contract with its own cooling-off rules, so take a day to think before you sign for it.
Tell the insurer and keep the evidence
With a policy in place, call the insurer before you agree the permanent repair. The Institution of Structural Engineers sets out an order: inform the insurer, make the property safe, and hold on to photographs and receipts. It calls photographs vital, since they are the visual evidence of what happened.
- Take wide shots that show which room or elevation is affected.
- Take close-ups of each fault, with a coin or a tape beside it for scale.
- Photograph wet belongings and flooring before you move them.
- Keep any pieces that came off the roof until they have been seen.
- Keep receipts for the make-safe visit and any hire costs.
Check your policy's own storm definition too. The Financial Ombudsman Service says a storm usually involves violent wind, usually accompanied by rain, hail or snow, and says it weighs the Beaufort Scale. It notes that certain insurers recognise storm-force wind only from a set point on that scale, and that wear and tear and gradual damage appear among the common exclusions. Which? found that only 32% of storm-related claims made in 2024 ended in a payout, which is why a tidy record counts for a lot.
A decision you dispute can go to the Financial Ombudsman Service on 0800 023 4567. The claim itself is between you and your insurer. Our answer on photographing storm damage sets out what a useful set of pictures looks like.
The repair, and what it costs
Once the roof is safe and the insurer knows, the repair itself starts with a survey, because the fault you can see from the ground is not always the whole story. A slipped tile may point to rusted nails across the slope, and a lifted ridge may mean the mortar has failed along its whole length. A good survey leaves you with photographs, a plain list of what was found and one total written price for the work.
For rough scale, MyJobQuote says storm repairs start at around £300, while extensive storm damage can cost £1,200 or more. Those are typical UK figures from its emergency roofer guide, not Castle prices, and the figure for your roof comes after the survey. Whether the insurer meets any of it depends on the policy.
The repair should aim to leave the roof stronger at the points that failed. For a ridge that has gone, that tends to mean re-fixing it mechanically or with a BS 8612:2018 dry-fix system, because after the 2015 amendments to BS 5534 mortar stopped being relied on by itself. Dry-fix is the clip and screw method of holding ridge, hip and verge pieces. A flat roof with torn felt may be patched, or recovered when its covering has little life left: HomeBuilding gives felt 10 to 15 years and Less gives 10 to 20.
If some of the damage is on a shared or terraced roof, tell your neighbours promptly, as water can travel across a party line before it shows.